Fun with PI!
Having invested in Warren Keller's excellent tutorial DVDs and book on Pixinight, I ran a test of doing a simple 4-pane mosaic of M31. I wanted to see if the step-by-step guide was going to help with the process and also how easy it was in PI.
So, I started off drawing the mosaic in Sequence Generator and did a 4-pane sequence, each pane having a 15% overlap to hopefully make it easy in the alignment process. Once I'd captured the data (6 x 300s for each pane) I proceeded to do the normal reduction process in PI:
- Calibrate with Super Bias, Darks, Flats and Cosmic Correction
- Register each panel
- Crop and stack to a single panel master
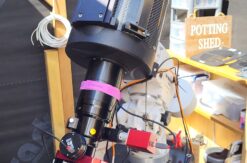
These are then ready for the mosaic process. I used the ED80 scope with my Atik One 6.0 camera, giving me a 1.19 x 0.95 ° field of view, with a resolution of 1.56" per pixel. I could have got away with two panes, but 4 makes it a fun test!
Once the data had been collected and processed, its then a case of following Warren's excellent guidance on the processes and scripts needed to create the mosaic. Essentially, it is a sequence of using reference masks, star alignment and gradient merge mosaic to produce the full frame version. Of course, the images may need additional processing before being joined into a single image - and they'll certainly need additional processing once you are ready to move to the non-linear mode!
This was a simple test - 4 panes and only one filter - for a colour image the same processes would need to be done for each colour (RGB or NB) filter of choice. You can see that a full colour RGB image would require 16 panels (for a 4-panel sequence) - and add to the the fact that the data will be collected at different nights with different conditions makes mosaics a complex image to produce - not for the feint-hearted!
So, this image is not intended as a finished article by any means, but as a test only - and I am pleased to say that it turned out well! I cannot see evidence of the joins in this at all, so I will certainly be making use of this process in the future! This image is reduced in size for the blog, the final version finished up at 4826x3771 pixels!